
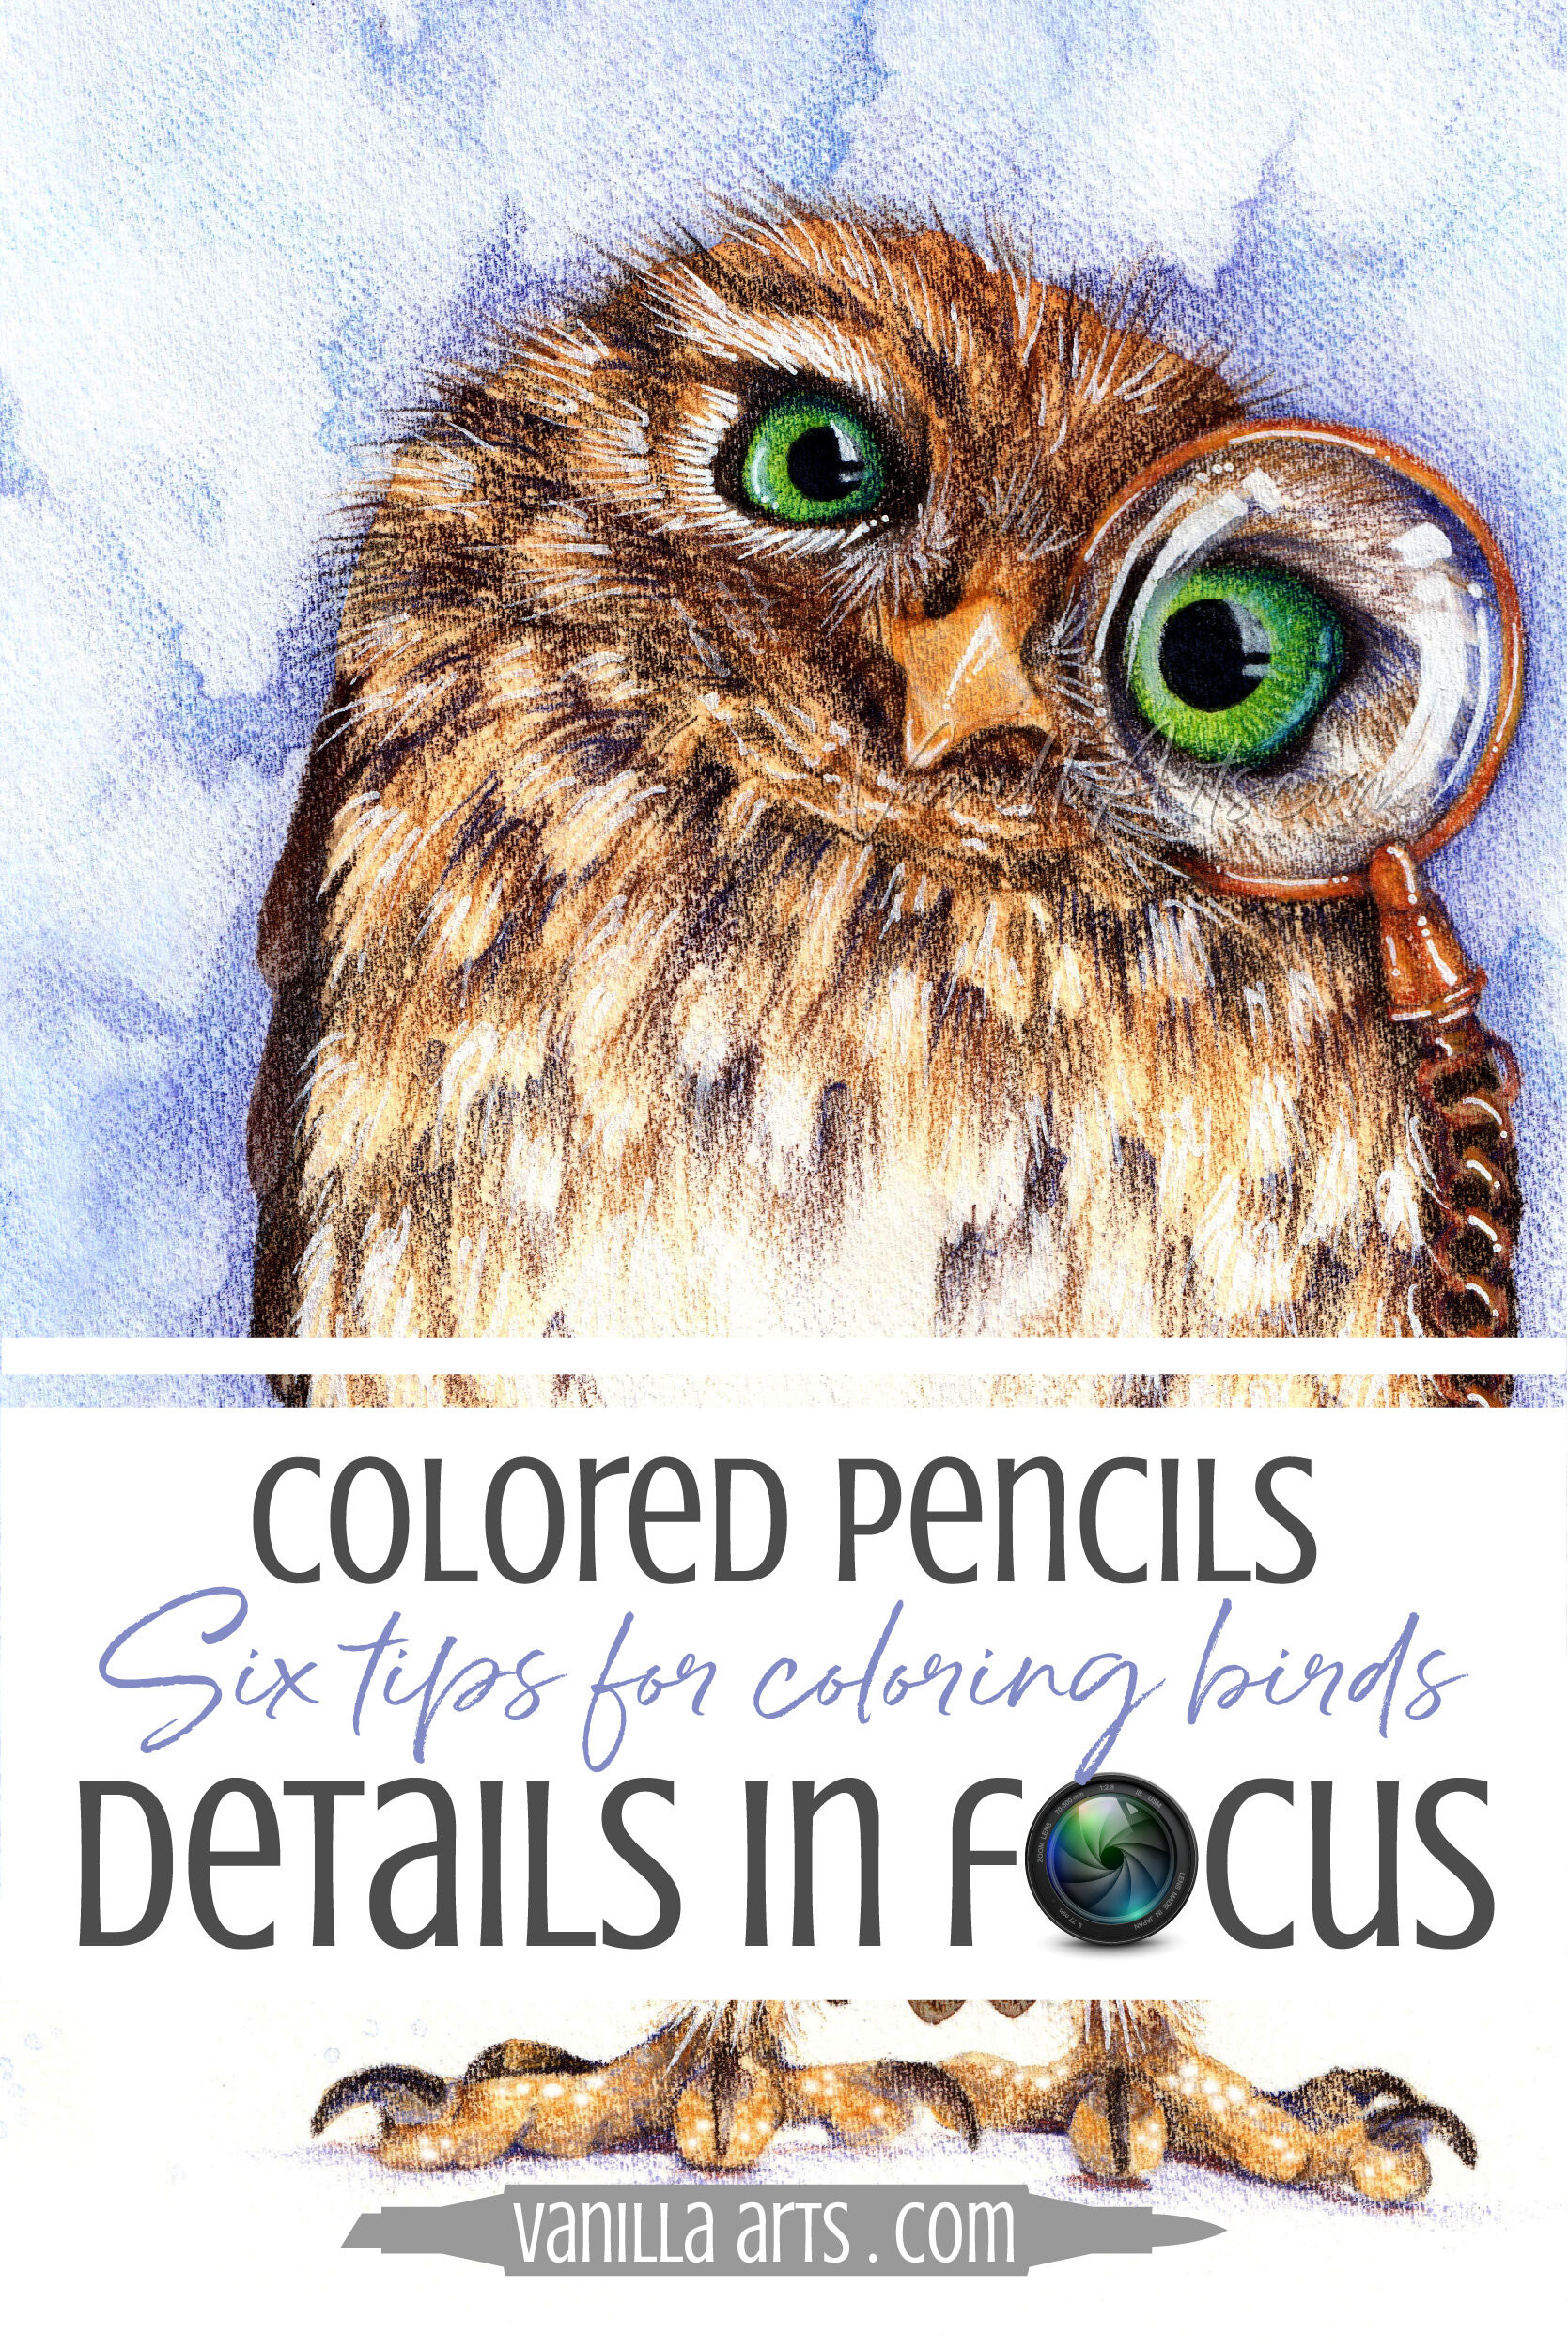
Details in Focus: 6 Tips for Coloring Realistic Birds (Copic Marker, Colored Pencil)

Do you want to color Realistic birds?
Traditional blending techniques teach you to color everything smooth.
It doesn’t matter what animal you’re coloring— furry puppies, spiky porcupines, scaly fish, or feathery flamingos— no problem, just color them all smooth!
So it’s no wonder your animals turn out generic and cartoonish.
Folks, this is nuts. As a professional artist, I can’t imagine ignoring the amazing textures that make birds so interesting and unique.
It’s not hard to add a little bit of realism to your coloring.
Here are six tips for adding more realism to your next bird project.

Professional illustrator Amy Shulke, shares 6 tips for coloring realistic birds with Copic Markers, colored pencils, or watercolor. Use photo references to customize the species, creating correct feather patterns plus birdlike eyes, beak, neck, and body carriage. Real birds, not stereotypes.

Birds that look birdlike?
Chances are, when you hear “bird”, the first two things that pop into your head are feathers and beaks.
We have a very skewed impression of birds. Donald Duck, Daffy Duck, and Big Bird are basically humans with beaks on their face and feathers on their rump.
So it’s not surprising that most of the artists creating line art, stamps, and coloring books draw generically shaped birds.
Because honestly, all an artist has to do is slap a beak and feathers on any random shape and you’ll say “Oh, look at the cute little bird!”
I don’t have to work very hard to draw a bird for you. I can draw a basic circle but as long as I put a beak on it, you’ll see a bird.
Feathers and beaks are stereotypes.
And stereotypes are fine if you’re just coloring for fun. You can blend your birds smooth and rely on the drawing of the beak and feathers to send the message “this is a bird”.
But if you want to draw, color, or paint realistic looking birds, you’re going to need more than a beak and feathers.
Read More:
(click to visit the article here at Vanilla Arts)


6 Tips for Coloring realistic birds
Or shall we say more realistic?
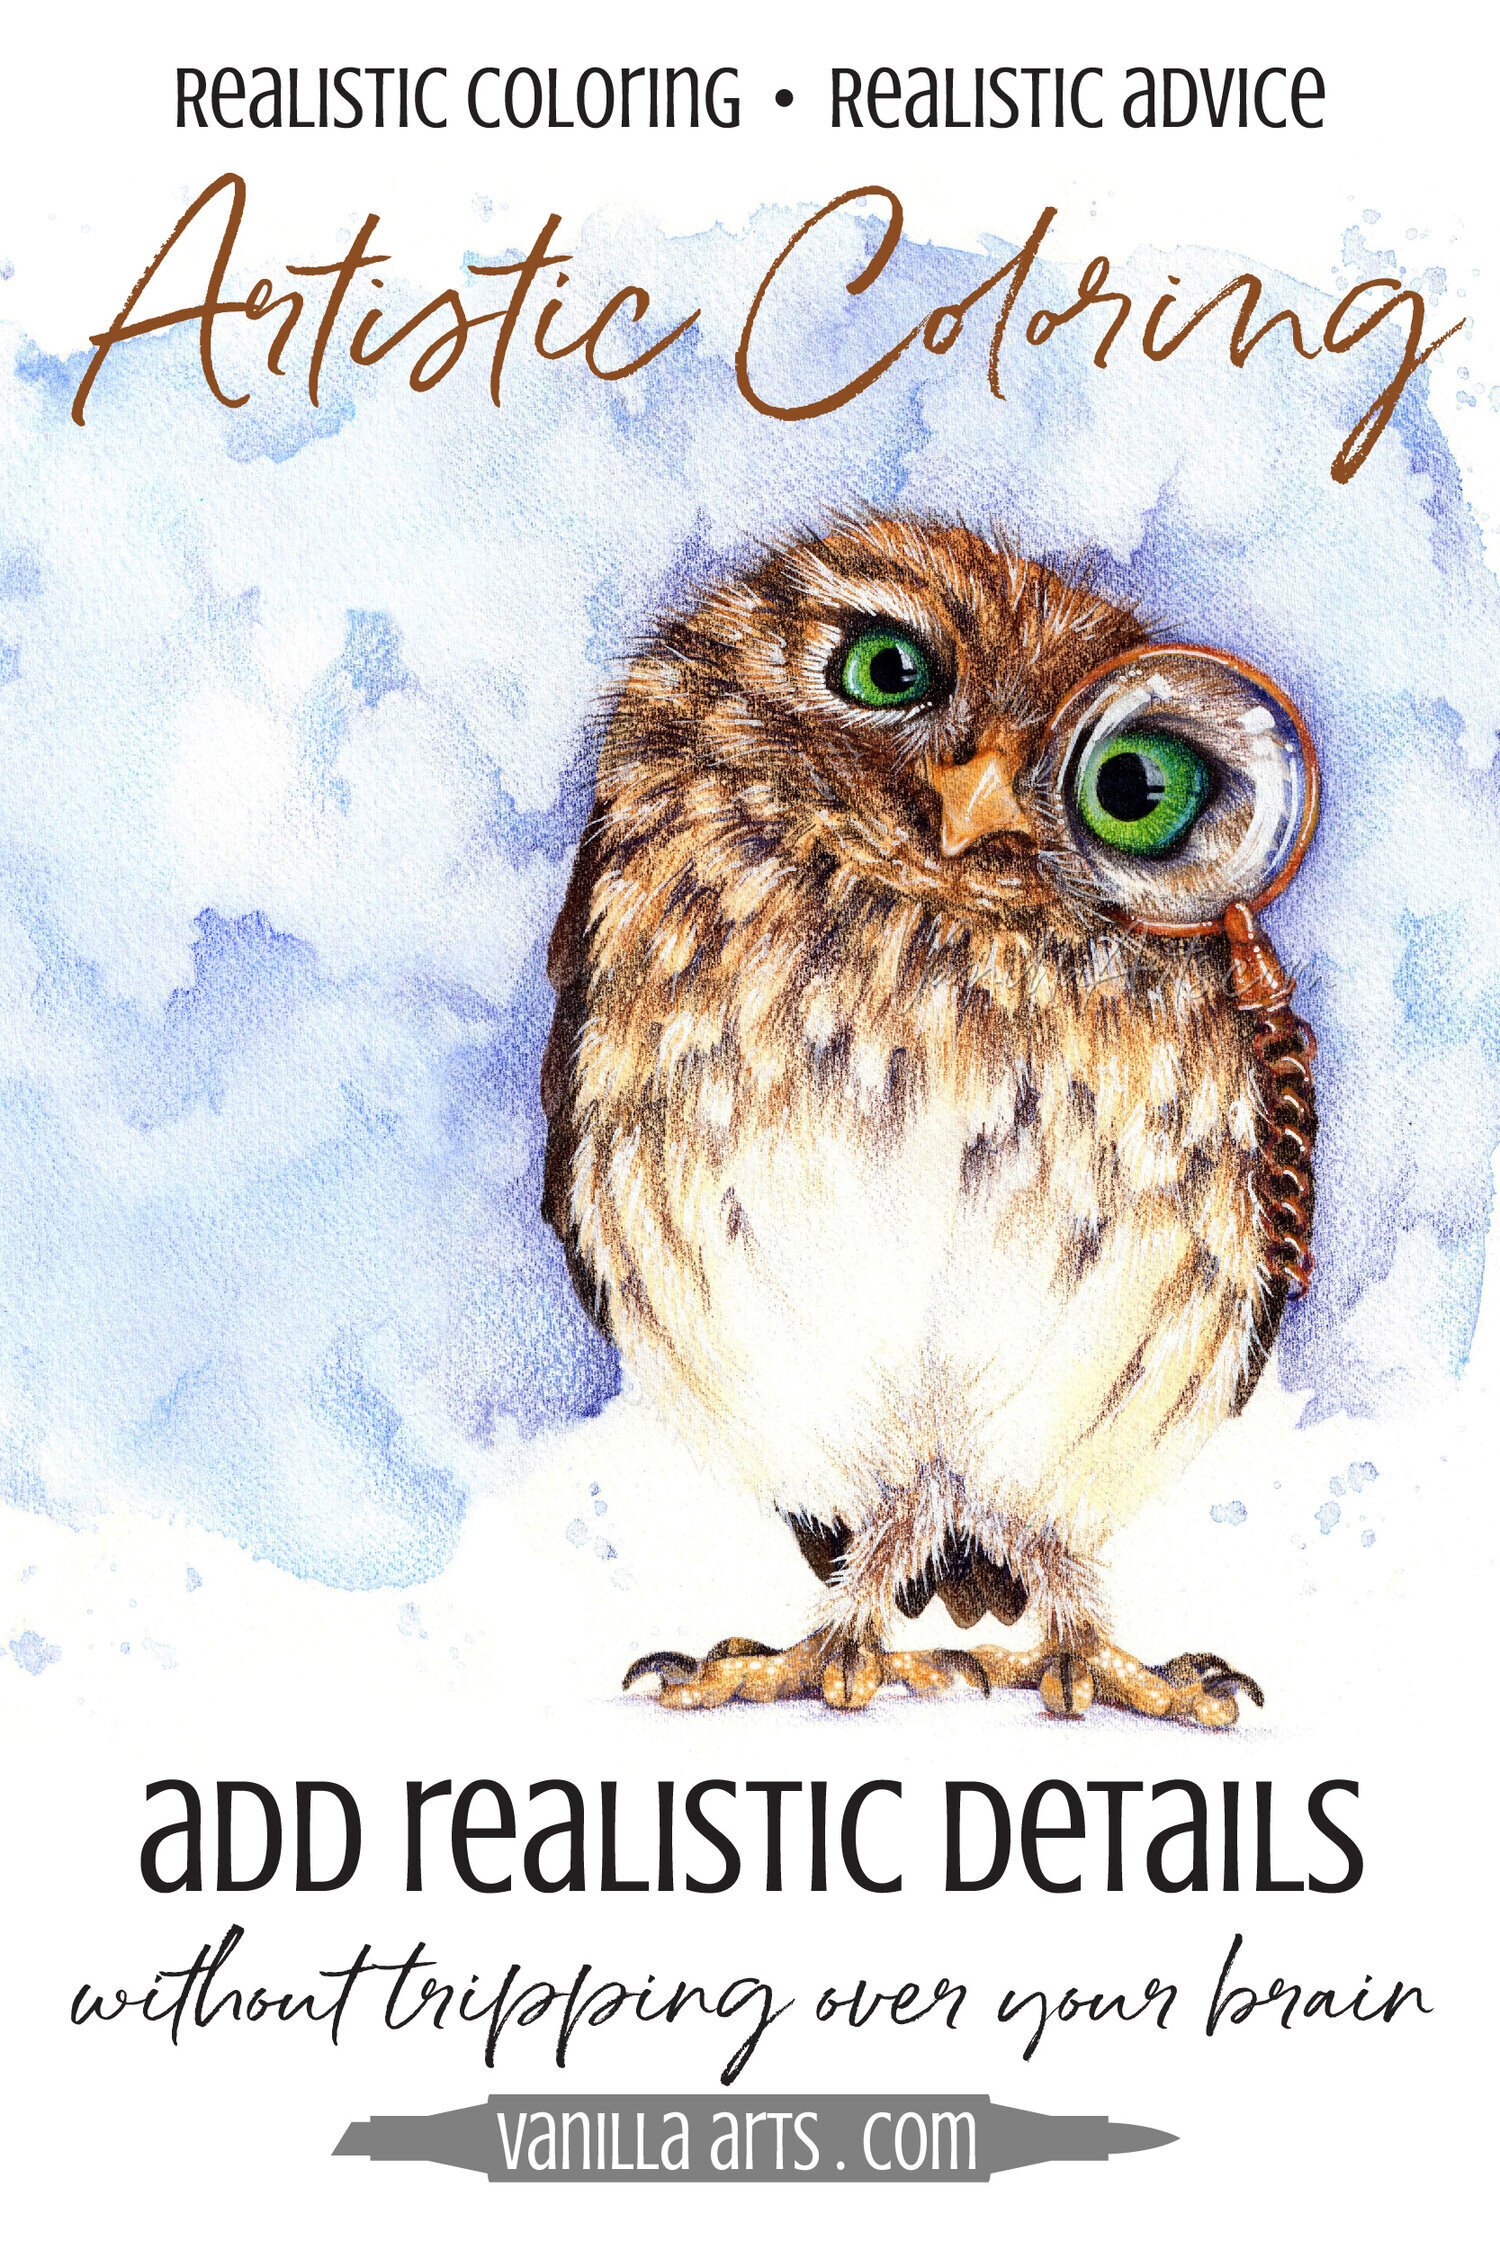
My Know it Owl project shown here isn’t entirely realistic. Let’s call this semi-realistic. That’s fine, you don’t have to shoot for photorealism on every project. Sometimes it’s fun to just play with the character yet still create a general sense of dimension and texture.
So here are six tips that I use when I color birds.
1. Use photo references to collect details specific to your species of bird.
Take a good look at the stamp or line drawing and match it to a specific species of bird.
For Know It Owl, the owl shape here is fairly generic. It’s obviously an owl and not a parrot but you could color this line art as a Barn Owl, a Snowy Owl, or you could even add head tufts for the owls with horns.

Photo references don’t just provide color and texture inspiration, they also help correct the weird misconceptions you carry in your head.
I talk more about the value of photo references in this article here.
Before this project, I’d never drawn an owl before and I’ve only seen them from a distance in real life. The hard beak with soft nostrils in my photo reference was much different than I expected.
This changed how I drew the stamp but it also changed how I colored it.
2. Look closely at the feathers in the photo reference. What kind of feathers do you see?
We all have a mental picture of feathers. They look like leaves and they’re staggered on a bird like roofing shingles.
But that’s not the only kind of feathers you’ll see on a bird.
In the photo reference for my Know It Owl, we’re looking at the face, neck, and belly of the owl where the feathers are softer and more raggedy than the leaf-style feathers. If I want my owl to look like an owl, I need to duplicate what I see rather than what I expect.
Every bird species has unique feather styles and patterns.
The feathers on a cardinal are different than those on a penguin or ostrich.
Look at the texture, color, length, and placement of the feathers before you start shingling the body with leaf shapes.
3. Bird eyes are not like human eyes.
Woody Woodpecker and Tweety Bird have misled you. You won’t see the whites of a bird’s eye.
The all-iris no-white look of a bird eye is is an important detail.
It also makes the eyes more interesting because you can fill the eye area with gorgeous color.

Also note that pupil size is important. The larger the pupil, the friendlier your bird will look. You can minimize the size to make the bird look more preditory.
Read more about eyes and pupils in my article here.
4. All bird beaks are different.
A triangle with two nostrils— that’s how we assume beaks look.
Nope.
If you stop to think about it, you know every bird has a slightly different shape of beak.
We vaguely know that eagles have sharply hooked beaks and ducks have a broad flat beak.
But here’s a test, without looking it up, tell me what kind of beak an ostrich has. What kind of beak does a penguin have?
Ahhh, some of you just thought about cartoon birds again, didn’t you?
Beak color and shape are an important way to identify the species and variety of bird. But it’s not just the beak that’s important.
Check your photo reference to see where the nostrils sit.
I worked in an ostrich hatchery while in college. (Yes, I’ve had some very strange jobs.) So I was very used to the shape of ostrich beaks and their big nostril openings which sit in grooves towards the top of the beak..
Then I tried to draw a Toucan and got totally confused when I didn’t see ANY nostrils in the photo reference.
How does a toucan breathe???
Some birds like ostriches, flamingos, geese, seagulls, cardinals, and sparrows have nostril openings in their hard beaks.
Some birds like toucans, macaws, puffins, and my young Elf Owl here have soft, fleshy nostrils that sit in the face, not in the hard beak.
In the case of a toucan, the nostrils are so well protected by the outer edge of his beak, it’s hard to find them in photo references.
Quick! Without looking, where are a penguin’s nostrils? Are they hard or soft?
If you’re picturing Chilly Willy, Pingu, or the team from Madagascar, they can’t help you because none of them have nostrils, mwhahahahha!
See? This is why you need photo references!
5. Birds have necks. Where is your bird’s neck?
I talk about bird necks a lot in my Red Bird online class. To me, the neck is the number one thing dividing the cartoons from the realistic birds.
Every bird has a thinning at the neck, even if you can’t see it through the ruff of feathers. Even owls have necks (and if that link is not funny enough, check out what’s below an owl’s skirt).
Okay, stop laughing. Back to the neck because this is important:
The neck alters how the feathers lay.

Especially underneath the beak and around the sides of the cheeks.
In my bird images, you’ll see I use darker or dirty (desaturated) color underneath the beak and behind the cheeks. I also tend to make the feathers sparser in these areas.
Both changes push the neck back and that in turn brings the head forward.
Otherwise your bird ends up shaped like an egg.
6. Birds have a tilted torso compared to humans.
The torso on a dog or cat is parallel to the ground. We don’t think twice about this for any four legged animal.
But people try to color birds as if they’re standing upright like a human.
They’re not.
Birds are halfway between a dog and a human. They’re tilted.
You can decide if I’ve achieved the look properly in Know It Owl but my goal to get the head to feel closer to the viewer than the leg and the legs closer than the tail. The body rolls down the chest but then pushes deeper for the belly and hips, then the legs and feet point closer to us again.
The bit of shade under the belly at the hips is really important to making the legs seem deeper. It gives the torso a tilt that is distinctly not-human.
By the way: the angle of a bird’s torso changes based on the activity. My owl here would have a horizontal torso in flight and may lower his body during sleep. Use this fact to add motion and even possibly emotion to your bird.
So there you go, I use these steps in my own work and encourage you to add a few to your coloring routine.
6 tips to color birds with greater realism:
Gather specific species details from photo references
Look closely at the feather texture rather than coloring assumptions
Only cartoon birds show the whites of their eyes
Capture beak details, especially hard or soft nostrils
All birds have a thin neck, find the underlying anatomy
Bird torsos are at a slant, not upright
These are easy steps for beginners to start with but as you practice and mature as an artist, these same steps will continue to challenge your skills.
Vanilla Arts Online Bird Classes:
(Click to visit the class info page)


Vanilla Arts Original Line Art:
(click to be taken to the item in the Vanilla Stamp Shop)


Feathery Challenge
Create realistic birds full of personality. Birds are more than just feathers!
Know it Owl
Artistic Coloring Kits are everything you need to challenge yourself with intermediate to advanced level images.
Explore your knowledge of texture and lost edges to achieve semi-realistic birds with personality!
Let your skill & creativity be the star of the image, not the stamp art. Ideal for large-scale projects in Copic Marker, colored pencil, or watercolor
Kit includes: digital stamp, suggested supply list, photo references, guide to shade and shadow & underpainting advice, color map & coloring process tips & photo collage

Select supplies used in Know It Owl:

Vanilla Arts Company is a participant in the Amazon Services LLC Associates Program, an affiliate advertising program designed to provide a means for use to earn fees by linking to Amazon.com.


